Tuesday, January 26, 2016

Nutanix Acropolis Hypervisor - Adding VMs to Image Service

If you've read my previous posts, you'll see I've provided instructions for building a new VM in Acropolis Hypervisor (AHV), as well as bringing a VM from ESXi into AHV. This post is going to focus on turning one of those VMs into an image (that's Nutanix for "Template") so that you can build new VMs from it quickly and easily as needed.

This post assumes you've already got a Windows VM built, either new or imported from ESXi. In either case, now would be a good time to patch it and make any other updates that you've been putting off.

Once you're ready to clone this VM, make sure to run Sysprep to generalize the Windows OS.

While the new and improved Image Service allows you to upload ISOs and disks using Prism, it doesn't allow you to add a VM that's already running on Nutanix to Image Service that way. For that you'll need to roll up your sleeves and use the Acropolis Command Line Interface (acli).

Login to any Controller VM (CVM) via SSH.
Type acli and press enter.
The first thing we need is the UUID of the vmdisk, so for that we'll use the vm.disk_get command. Like any good cli, you can use the tab key to auto populate information. If you type vm.disk_get and hit tab you'll see the names of all VMs in your cluster.

<acropolis> vm.disk_get
TestVM        W2K12R2-Test  blmpower1

Start typing the name of the VM you want to query and press tab again to fill in the rest.

<acropolis> vm.disk_get W2K12R2-Test
addr {
  bus: "ide"
  index: 0
}
cdrom: true
empty: true
addr {
  bus: "scsi"
  index: 0
}
vmdisk_uuid: "69df5abd-6570-4ce1-ba77-2d117c3df7e5"
source_vmdisk_uuid: "d6c7a984-421c-403e-b579-4885961c698d"
container_id: 8
vmdisk_size: 42949672960

Here you see the vmdisk_uuid. Select the whole string inside of the quotes.

Now use the image.create command (covered in a previous post) to create a new image using the existing disk.

<acropolis> image.create W2K12R2-Template clone_from_vmdisk=69df5abd-6570-4ce1-ba77-2d117c3df7e5 image_type=kDiskImage
ImageCreate: complete

Now when you click the gear icon in Prism and select Image Configuration, you'll see the new image listed there. Now it can be selected straight from Image Service by anyone who needs it when building a new VM.


Converting ESXi to Acropolis Hypervisor - Part 3 - Importing VMware Virtual Machines

In my previous posts we destroyed a Nutanix cluster running ESXi and installed Acropolis Hypervisor (AHV) using the Foundation 3.0 process, which is now built directly into each Nutanix Controller Virtual Machine (CVM).

Now it's time to pull some VMs from your legacy ESXi environment into AHV. Keep in mind that if you're already a Nutanix customer with an ESXi hypervisor cluster, this process will be automated in a future release (as shown during the general session at the .NEXT conference in Miami).

Before proceeding, you might want to take a quick look at my other post on using the Image Service and creating a virtual network for your VMs as a quick primer, as I won't go into great detail on either of these here.

If you're not already running ESXi on your Nutanix cluster and are starting from scratch with AHV, you can use these steps to import VMware VMs into Acropolis. This can be done through a few different methods, but if you've got a set of VMware templates that you use all the time, it would make sense to import those into the Acropolis Mobility Fabric (AMF) Image Service so that you can clone them easily.

The AMF Image Service supports a variety of formats, including raw, vhd, vmdk, vdi, iso, qcow2. This means you won't need to convert an ESXi vmdk to a different format in order to use it with AHV. If you're using Windows, the VirtIO drivers need to be installed before bringing the VM over to AHV. Think of VirtIO as Nutanix Guest Tools, or the equivalent of VMware Tools. You need the virtual SCSI driver in order to boot the VM.

In my example I am going to take an existing Windows Server 2012 R2 template in ESXi and prepare it for migration into AHV.

To start, I am going to deploy a new VM from the existing template so that I can install the VirtIO drivers on it without changing the original template. 

Next I will install the VirtIO drivers. These are available from the Nutanix portal as both an ISO image as well as an MSI executable.

Once the VirtIO drivers are installed, uninstall VMware Tools. 

Now power off the VM. Make sure there are no VMware vCenter-based snapshots for the VM. Make a mental note of where the VM's vmdk file resides. 

Make sure you download the VM's "flat" vmdk file. You should see the word 'flat' in the name, and it will be much larger than the other VMDK file.


This could take some time depending on the size of the VM. Once the download is complete, login to Prism, click the gear icon, and select Image Configuration.


If you read my previous post on getting started with the Image Service, these steps should be familiar. 

Click the 'Upload Image' button and fill in the details.


Click Save to begin uploading the VMDK file.

Once the image creation is complete, close the Image Configuration window and go to the Prism VM view.

We're now going to create a new VM based on the VMDK file that we pulled over from our old ESXi environment.

Click 'Create VM' and give the new VM a name, vCPU, and memory.

Click 'New Disk', change the Operation drop down to 'CLONE FROM IMAGE SERVICE', and select the Image that you created in the previous section.


Click Add and give the VM a NIC if you prefer. Once complete, click Save.

Since this is a clone operation, it will happen very fast.

Click the Table view and select the new VM. Click 'Power On' (underneath the table) and then Launch Console once it becomes available. You should see the VM boot into Windows as you normally would. 


You only need to bring your template VMs from ESXi into the Acropolis Image Service once. From there you can clone as many times as needed directly from Prism, or from acli, the AHV command line.

You may be curious about how the devices appear to Windows once moved to AHV. You can login to Windows and look at Device Manager. 


Monday, January 25, 2016

Nutanix Acropolis Hypervisor - Getting Started with Virtual Machines

In the previous post, I showed you how to import an existing ISO file to the Nutanix Acropolis Mobility Fabric image service, as well as how to create a virtual machine network. Now it's time to get to the fun part...creating VMs.

Acropolis Hypervisor - Creating Virtual Machines

Login to Prism and click on the Home drop down menu at the top left side. Select VM from the menu.

If you've used Nutanix with other hypervisors in the past, you'll notice a new button with Acropolis Hypervisor (AHV). There is a "Create VM" button on the top right side. Click it to get started.


First, give the VM a name, along with come vCPU and memory resources.


Now let's add a virtual disk by clicking the "New Disk" button. This menu has a lot of different options which I plan to elaborate on later. For now, let's take the defaults and give it a modest amount of disk based on the Guest OS you intend to use. I'm using a minimal CentOS build in this example.

Click Add. Now you'll see two disks for this VM. One is a CDROM and the other is a standard virtual disk.

Click the pencil icon for the CDROM drive. Under the Operation drop down, select "CLONE FROM IMAGE SERVICE" and use the Image drop down to select the ISO file that you wish to use. If it's not there, go back to my previous post about using the Image Service and import it.


Click Update to save this configuration.

Now click on the "New NIC" button. This is one minor annoyance that I have with Acropolis so far in that it doesn't display the name that I gave to the network configuration when I created it. Instead it just shows vlan.0 and any other VLAN IDs that have been defined. It can be hard to remember VLAN IDs so displaying the network name (such as "VM Network") would be a bit more helpful, in my opinion. 

If you are using IP Management in Acropolis as previously discussed, there is no need to manually assign an IP address here. 


Click Add to complete. Review your settings and click Save to create your first Acropolis Hypervisor VM.

The VM will show up in either the VM Overview or VM Table views in Prism. If you've already created a bunch of VMs, you can use the 'search in table' box to find it. Once you click on it, you will see some options underneath the table to Power On, Take Snapshot, Clone, Update, or Delete. Power the VM on.

Once the VM is powered on you can Launch Console to interact with it. You should see the VM booted to the ISO file that you specified. 


If you're a Google Chrome fan, you'll see a prompt that the preferred browsers for the Launch Console are Firefox and Internet Explorer. I'm not sure what IE can do better than Chrome, but you may find some weird behavior if you insist on using Chrome. Personally I ran into some keyboard issues, particularly typing periods. It just didn't work with Chrome. 

One nice thing about building a Linux VM on AHV is that you don't need to load any special device drivers for the virtual machine's virtual SCSI adapter. If you're building a Windows VM, make sure you download the VirtIO drivers from the Nutanix portal and add it to the Image Service. 

I won't highlight the OS install process here as I assume if you've made it this far, this isn't your first rodeo. You'll notice the install is very fast thanks to the Image Service. It's not pulling it across the wire through an ISO mount process from your client or anything like that. It's pulling it directly from the same container that it's running on. Slick.

Remember to disconnect the ISO file from the VM's CDROM drive after all the binaries are copied and the install process is complete.

Consider this VM your base template if you will. All other VMs can be cloned from this one.

If you want to clone this VM once, you can easily do that from Prism by clicking on the VM name and then clicking the Clone link underneath the VM table.

However, if you want to clone this VM multiple times, you can use Acropolis CLI, or acli.

Login to any Controller VM (CVM) in your cluster and type acli and press enter.

At the acli prompt, issue a command similar to the following to clone the VM multiple times at once.


<acropolis> vm.clone testclone[1..10] clone_from_vm=TestVM

This command will create 10 virtual machines named testclone1 through testclone10, all cloned from the same TestVM virtual machine created in the previous steps. 

You can then use the vm.on command to boot them all simultaneously. For example:

<acropolis> vm.on testclone*


Nutanix Acropolis Hypervisor - Getting Started with Pulse, Image Service, and Network Config

In my previous posts I showed you how to blow away a Nutanix cluster running ESXi and deploy Acropolis Hypervisor (AHV) from scratch. At this point you should have pointed your web browser to an IP address of one of your CVMs, or to the cluster IP if you created one. This will take you to the Nutanix Prism interface.

The default password has changed since the early days of Nutanix. For a clean install of 4.5.x, login as admin admin. You'll be prompted to change the password immediately, as well as agree to the Nutanix EULA.

Now that you've logged in, you should see the Prism Home screen, which is a great overall dashboard.

You'll see right out of the gate a red banner across the top, which is telling you to enable Pulse.


Click the "Learn more and configure Pulse" link.

Pulse is a great way to send diagnostic data to Nutanix in order to provide proactive support. There is no security sensitive information sent to Nutanix. I'm sure you've already read the EULA and want to enable Pulse. To do so, make sure Enable Pulse is checked and click Save.


Acropolis Hypervisor Image Service
Now let's pull some ISOs into the environment by using the Image Service. That way we have the software we need to build some VMs.

In the old days, you had to import ISOs or disk files into the Image Service with an acli command line string. However, this can now be done by using Prism.

Old Way

Login to any Nutanix CVM using SSH.

Enter the Acropolis CLI by typing acli and pressing enter.

The Image Service supports file access via http or NFS. If you're like me, you may have had your ISOs sitting on a Windows file server. It was a little annoying getting IIS configured to simply list the directory contents, but that's how I did it. I'm not an IIS expert by any stretch, so Google is your friend for that task.

Now that you're in the acli, let's pull in an ISO. I'm using CentOS 6.4 as an example.

<acropolis> image.create centos-6.4-x86_64-minimal source_url=http://iswblmvum01.tec.sirius/CentOS/CentOS-6.4-x86_64-minimal.iso container=default-container-12996 image_type=kIsoImage

The syntax can be viewed and explained by using the Acropolis Application Mobility Fabric Guide.

Essentially I created an image named centos-6.4-x86_64-minimal and pointed to my shiny fancy new IIS server, which was simply configured to use the existing file share as its root directory. You'll notice the container name specified for the container= argument is referencing a default container. This is the one that was created by the Foundation process when the cluster was built. You can tab complete this part via acli, and it will automatically put it there for you. When complete you should see a completion message.

ImageCreate: complete

You can now list the contents of your image store as well by issuing an image.list command in acli.

<acropolis> image.list
Image name                 Image UUID
WindowsServer2012-VL       1975dcf6-14c3-4bf9-9cc1-4ee88ae49b19
WindowsServer2012R2-VL     87a86643-1234-4648-b53e-359c8f13f87a
centos-6.4-x86_64-minimal  5136dedf-7d32-403c-8923-4fde986bc8ef

If you plan on deploying Windows VMs, make sure to download the VirtIO ISO for Windows from the Nutanix portal and add it to the Image Service as well. You'll need the VirtIO SCSI driver to see the virtual disks in AHV VMs. 

New (and improved) Way
Click the gear icon in Prism and select Image Configuration.
Click the "Upload Image" icon and give the image a name, a description (e.g. annotation), and select the image type. The image type will be ISO or disk. The Image Service supports raw, vhd, vmdk, vdi, iso, qcow2 disk formats. You can continue to upload from a URL if you prefer, or you can upload the file directly from your browser, which is very handy and a big time saver.

When you're finished, you'll see all of the images that have been uploaded. You can choose to activate them or make them inactive, which will hide them and prevent them from being used.


Acropolis Hypervisor Network Config
Now we need some networking for our VMs. Login into Prism and click the VM drop down from the menu. Look for a link in the top right corner that says Network Config. Click it.

Click the Create Network button.

Since old habits die hard, I'm calling my network 'VM Network'. I'm also not using any VLAN tags in this environment, so I've specified VLAN 0 to allow the native VLAN to come through.


Nutanix can do IP address management for you, so let's configure that as well to make things easy.

These steps are pretty straightforward. You define a network in CIDR notation (e.g. 192.168.50.0/24), along with the default gateway for that network. 

You can choose whether or not you want to list DNS servers, as well as the domain search order, as well as the overall domain name. 

If you have a TFTP boot server, you can define that here as well, along with the boot file name.

To set an IP range, click the "Create Pool" button under the IP Address Pools section. Provide a start and end address. 

Finally, you can override any existing DHCP server that might be out there by specifying its IP address. Don't make your network admin mad!

In my next post we'll finally get to the fun part...creating a VM.

Friday, January 22, 2016

Converting ESXi to Acropolis Hypervisor - Part 2 - Using Foundation 3.0

In the previous post, Converting ESXi to Acropolis Hypervisor - Part 1, I showed you how to destroy your ESXi cluster and get back to square one with the new and improved Foundation 3.0 process, which is now baked into the CVM as of Acropolis Base Software 4.5. This is a nice improvement over the old way of using Foundation. If you're using Nutanix, you likely recall that a Nutanix SE or a partner SE had to come onsite with a laptop and plug into your network (or a local switch with all the Nutanix nodes plugged in) in order to initialize the cluster for the first time.

Moving Foundation into the CVM allows customers to perform this process on their own. This post will highlight the new Foundation 3.0 wizard.

As mentioned in part 1, point your browser to the IPv4 or IPv6 (link local) address of the CVM on port 8000, followed by a /gui. One key thing to note here is that while IPv4 will work, it will NOT allow you to change your CVM IPs. If you need to change CVM IPs, you're going to need to pull the IPv6 address from a CVM (via SSH, ifconfig and look for the inet6 addr of eth0) and go there instead. IPv6 will also require that the device you're browsing from (like your laptop) be plugged into the same L2 broadcast domain as the Nutanix CVMs.

IPv4 example: http://192.168.100.10:8000/gui
IPv6 example: [fe80::5b54:fg:fe8d:435b]:8000/gui
Note the brackets are required before and after the IPv6 address!

Before starting the wizard and blindly clicking next, think about what Redundancy Factor you want in your cluster. Now is the time to decide if you want any containers with RF3. RF3 keeps three copies of data, but does require a minimum of five nodes. You can select which RF factor you want by clicking the 'Change RF' link in the top left corner of Foundation.


I only have a four node cluster, so RF2 is my only choice.

Select all available nodes and click the Next button in the bottom right corner.

Step 2 is all about cluster properties and high level network information for the CVMs, the hypervisor, and the IP Management Interface. These are things like subnet mask, default gateway, DNS, etc. Don't forget to choose your CVM memory size (like I did in the screen shot below). I recommend 24GB minimum, and 32GB or more if you plan to use dedupe.


Click Next

Step 3 let's you define hypervisor host names and IPs, along with IPs for the CVMs and IPMIs. The range fields are nice because they auto-populate the manual input fields with data, resulting in a lot less typing and less chance of errors. If you use contiguous blocks of IPs for each one, you can type the last octet of the first IP into the top field and it will auto-populate the rest. That's slick.


If you've used Nutanix at all you know that your CVM IP and host hypervisor IP need to be in the same subnet. You'll also notice that there is no option for defining a VLAN ID here. I always tell customers using VLAN tagging to set the default VLAN (untagged) for those ports to the VLAN assigned to the respective CVM/hypervisor subnet. That way the traffic can pass through untagged and setup is nice and easy. You can use VLAN tags later for VM traffic. 

Click 'Validate Network' to continue.

If all goes well, you should be prompted for images. You're going to need both Acropolis Base Software (previously known, and still sometimes referred to, as NOS) images as well as hypervisor images. However if you're deploying AHV, it's included in the...
Don't make the mistake I did once before and accidentally use an older version of Acropolis. Remember, Foundation wasn't made available in the CVM until 4.5, so if you go to an older version, things are going to get weird.


Yes, it is a little strange that if you're already running Acropolis Base Software 4.5.1.2 that you have to upload 4.5.1.2 binaries, but I think that's because there isn't a copy stored locally on the CVMs. Plus, the CVMs are ESXi VMs, not AHV VMs, so they will need to be deleted and redeployed anyway. 

Notice that it detected that I was already running ESXi 6.0.0-3073146. If you click the AHV link (in the middle), you'll notice that the installer ISO has already been "uploaded" since it's part of ABS already. In other words, if you're moving to AHV, you don't need a separate hypervisor ISO for that, just the Acropolis Base Software binary.

Once both Acropolis Base Software and Hypervisor boxes show that the software has been uploaded, click Create Cluster.


This process will take some time. For four nodes you can count on approximately 45-50 minutes. If you're really impatient like me you can use the handy log links to view what's happening. The log link next to the Overall Progress bar will give you general cluster creation info. There are separate log links for each node, which are much more detailed. 


You'll notice the first host is done by itself while the others wait. After the first host is complete, all the others will be done in parallel. 


Once everything hits 100%, you'll see a completion message along with a link to take you into Prism. Wasn't that easy?


Next up I'll walk you through getting comfortable using Acropolis Hypervisor. Stay tuned!

Converting ESXi to Acropolis Hypervisor - Part 1 - A Clean Slate

Upgrade Acropolis Base Software (formerly known as NOS) to 4.5.1.2, which includes Foundation 3.0.1 in the CVM. I won't bother detailing the one-click upgrade process for Nutanix, as it is very easy and well documented elsewhere.

Backup any VMs that you wish to retain to a storage device outside of Nutanix, as we're going to blow away the existing Nutanix cluster in order to start from scratch.

If you want to keep data intact and convert ESXi to AHV one node at a time, you'll need to wait for Acropolis Base Software 4.6.

Once you're sure you've backed up all your important data, login to any CVM via SSH.

In the SSH terminal, issue a cluster stop command.


nutanix@NTNX-SERIALNUM-B-CVM:192.168.100.11:~$ cluster stop
2016-01-22 09:05:10 INFO cluster:1886 Executing action stop on SVMs 192.168.100.10,192.168.100.11,192.168.100.12,192.168.100.13
2016-01-22 09:05:10 INFO cluster:1895

***** CLUSTER NAME *****
MSP_NTNX

This operation will stop the Nutanix storage services and any VMs using Nutanix storage will become unavailable. Do you want to proceed? (Y/[N]): y
Waiting on 192.168.100.10 (Up) to stop:  Zeus Scavenger SSLTerminator SecureFileSync Acropolis Medusa DynamicRingChanger Pithos Stargate Cerebro Chronos Curator Prism CIM AlertManager Arithmos Snmp SysStatCollector Tunnel ClusterHealth
Waiting on 192.168.100.11 (Up, ZeusLeader) to stop:  Zeus Scavenger SSLTerminator SecureFileSync Acropolis Medusa DynamicRingChanger Pithos Stargate Cerebro Chronos Curator Prism CIM AlertManager Arithmos Snmp SysStatCollector Tunnel ClusterHealth
Waiting on 192.168.100.12 (Up) to stop:  Zeus Scavenger SSLTerminator SecureFileSync Acropolis Medusa DynamicRingChanger Pithos Stargate Cerebro Chronos Curator Prism CIM AlertManager Arithmos Snmp SysStatCollector Tunnel ClusterHealth
Waiting on 192.168.100.13 (Up) to stop:  Scavenger SSLTerminator SecureFileSync Acropolis Medusa DynamicRingChanger Pithos Stargate Cerebro Chronos Curator Prism CIM AlertManager Arithmos Snmp SysStatCollector Tunnel ClusterHealth
Waiting on 192.168.100.10 (Up) to stop:  Zeus Scavenger SSLTerminator SecureFileSync Acropolis Medusa DynamicRingChanger Pithos Stargate Cerebro Chronos Curator Prism CIM AlertManager Arithmos Snmp SysStatCollector Tunnel ClusterHealth
Waiting on 192.168.100.11 (Up, ZeusLeader) to stop:  Zeus Scavenger SSLTerminator SecureFileSync Acropolis Medusa DynamicRingChanger Pithos Stargate Cerebro Chronos Curator Prism CIM AlertManager Arithmos Snmp SysStatCollector Tunnel
Waiting on 192.168.100.12 (Up) to stop:  Zeus Scavenger SSLTerminator SecureFileSync Acropolis Medusa DynamicRingChanger Pithos Stargate Cerebro Chronos Curator Prism CIM AlertManager Arithmos Snmp
Waiting on 192.168.100.13 (Up) to stop:  Scavenger SSLTerminator SecureFileSync Acropolis Medusa DynamicRingChanger Pithos Stargate Cerebro Chronos Curator Prism CIM AlertManager Arithmos Snmp
Waiting on 192.168.100.10 (Up) to stop:  Zeus Scavenger SSLTerminator SecureFileSync Acropolis Medusa DynamicRingChanger Pithos Stargate Cerebro Chronos Curator Prism CIM AlertManager Arithmos Snmp
Waiting on 192.168.100.11 (Up, ZeusLeader) to stop:  Zeus Scavenger SSLTerminator SecureFileSync Acropolis Medusa DynamicRingChanger Pithos Stargate Cerebro Chronos Curator Prism CIM AlertManager Arithmos Snmp
Waiting on 192.168.100.12 (Up) to stop:  Zeus Scavenger SSLTerminator SecureFileSync Acropolis Medusa DynamicRingChanger Pithos Stargate Cerebro Chronos Curator Prism CIM AlertManager Arithmos Snmp

Waiting on 192.168.100.13 (Up) to stop:  Scavenger SSLTerminator SecureFileSync Acropolis Medusa DynamicRingChanger Pithos Stargate Cerebro Chronos Curator Prism CIM AlertManager Arithmos

Note: Your SSH session may drop during the cluster stop process. If so, just open a new SSH to a different CVM in your cluster.

Check to make sure the cluster has stopped. It's normal for Zeus and Scavenger to be up, but the rest of the cluster services should be down on all CVMs.

nutanix@NTNX-SERIALNUM-A-CVM:192.168.100.10:~$ cluster status
2016-01-22 09:06:44 INFO cluster:1886 Executing action status on SVMs 192.168.100.10,192.168.100.11,192.168.100.12,192.168.100.13
The state of the cluster: stop
Lockdown mode: Disabled

        CVM: 192.168.100.10 Up
                                Zeus   UP       [4059, 4085, 4086, 4087, 4168, 4181]
                           Scavenger   UP       [4723, 4753, 4754, 4799]
                       SSLTerminator DOWN       []
                      SecureFileSync DOWN       []
                           Acropolis DOWN       []
                              Medusa DOWN       []
                  DynamicRingChanger DOWN       []
                              Pithos DOWN       []
                            Stargate DOWN       []
                             Cerebro DOWN       []
                             Chronos DOWN       []
                             Curator DOWN       []
                               Prism DOWN       []
                                 CIM DOWN       []
                        AlertManager DOWN       []
                            Arithmos DOWN       []
                                Snmp DOWN       []
                    SysStatCollector DOWN       []
                              Tunnel DOWN       []
                       ClusterHealth DOWN       []
                               Janus DOWN       []
                   NutanixGuestTools DOWN       []

        CVM: 192.168.100.11 Up, ZeusLeader
                                Zeus   UP       [3911, 3937, 3938, 3939, 4020, 4033]
                           Scavenger   UP       [4578, 4607, 4608, 4653]
                       SSLTerminator DOWN       []
                      SecureFileSync DOWN       []
                           Acropolis DOWN       []
                              Medusa DOWN       []
                  DynamicRingChanger DOWN       []
                              Pithos DOWN       []
                            Stargate DOWN       []
                             Cerebro DOWN       []
                             Chronos DOWN       []
                             Curator DOWN       []
                               Prism DOWN       []
                                 CIM DOWN       []
                        AlertManager DOWN       []
                            Arithmos DOWN       []
                                Snmp DOWN       []
                    SysStatCollector DOWN       []
                              Tunnel DOWN       []
                       ClusterHealth DOWN       []
                               Janus DOWN       []
                   NutanixGuestTools DOWN       []

        CVM: 192.168.100.12 Up
                                Zeus   UP       [3617, 3643, 3644, 3645, 3726, 3739]
                           Scavenger   UP       [4282, 4313, 4314, 4354]
                       SSLTerminator DOWN       []
                      SecureFileSync DOWN       []
                           Acropolis DOWN       []
                              Medusa DOWN       []
                  DynamicRingChanger DOWN       []
                              Pithos DOWN       []
                            Stargate DOWN       []
                             Cerebro DOWN       []
                             Chronos DOWN       []
                             Curator DOWN       []
                               Prism DOWN       []
                                 CIM DOWN       []
                        AlertManager DOWN       []
                            Arithmos DOWN       []
                                Snmp DOWN       []
                    SysStatCollector DOWN       []
                              Tunnel DOWN       []
                       ClusterHealth DOWN       []
                               Janus DOWN       []
                   NutanixGuestTools DOWN       []

        CVM: 192.168.100.13 Up
                           Scavenger   UP       [3518, 3549, 3550, 3589]
                       SSLTerminator DOWN       []
                      SecureFileSync DOWN       []
                           Acropolis DOWN       []
                              Medusa DOWN       []
                  DynamicRingChanger DOWN       []
                              Pithos DOWN       []
                            Stargate DOWN       []
                             Cerebro DOWN       []
                             Chronos DOWN       []
                             Curator DOWN       []
                               Prism DOWN       []
                                 CIM DOWN       []
                        AlertManager DOWN       []
                            Arithmos DOWN       []
                                Snmp DOWN       []
                    SysStatCollector DOWN       []
                              Tunnel DOWN       []
                       ClusterHealth DOWN       []
                               Janus DOWN       []
                   NutanixGuestTools DOWN       []
2016-01-22 09:06:47 INFO cluster:1993 Success!

One last time...make sure you've backed up anything on the Nutanix cluster that you wish to retain - VMs, templates, etc. If you forgot something you're going to need to start the cluster again (e.g cluster start).

In the SSH terminal, issue a cluster destroy command.

nutanix@NTNX-SERIALNUM-A-CVM:192.168.100.10:~$ cluster destroy
2016-01-22 09:07:04 INFO cluster:1886 Executing action destroy on SVMs 192.168.100.10,192.168.100.11,192.168.100.12,192.168.100.13
2016-01-22 09:07:04 INFO cluster:1895

***** CLUSTER NAME *****
MSP_NTNX

This operation will completely erase all data and all metadata, and each node will no longer belong to a cluster. Do you want to proceed? (Y/[N]): Y
2016-01-22 09:07:24 INFO cluster:935 Cluster destroy initiated by ssh client IP: 192.168.140.62
2016-01-22 09:07:28 INFO cluster:418 Restarted Genesis on 192.168.100.11.
2016-01-22 09:07:28 INFO cluster:418 Restarted Genesis on 192.168.100.10.
2016-01-22 09:07:28 INFO cluster:418 Restarted Genesis on 192.168.100.13.
2016-01-22 09:07:28 INFO cluster:418 Restarted Genesis on 192.168.100.12.
2016-01-22 09:07:28 INFO cluster:325 Checking for /home/nutanix/.node_unconfigure to disappear on ips [u'192.168.100.10', u'192.168.100.11', u'192.168.100.12', u'192.168.100.13']
2016-01-22 09:07:31 INFO cluster:325 Checking for /home/nutanix/.node_unconfigure to disappear on ips [u'192.168.100.11', u'192.168.100.10', u'192.168.100.13', u'192.168.100.12']
2016-01-22 09:07:33 INFO cluster:325 Checking for /home/nutanix/.node_unconfigure to disappear on ips [u'192.168.100.11', u'192.168.100.10', u'192.168.100.13', u'192.168.100.12']
2016-01-22 09:07:36 INFO cluster:325 Checking for /home/nutanix/.node_unconfigure to disappear on ips [u'192.168.100.11', u'192.168.100.10', u'192.168.100.13', u'192.168.100.12']
2016-01-22 09:07:39 INFO cluster:325 Checking for /home/nutanix/.node_unconfigure to disappear on ips [u'192.168.100.11', u'192.168.100.10', u'192.168.100.13', u'192.168.100.12']
2016-01-22 09:07:41 INFO cluster:325 Checking for /home/nutanix/.node_unconfigure to disappear on ips [u'192.168.100.11', u'192.168.100.10', u'192.168.100.13', u'192.168.100.12']
2016-01-22 09:07:44 INFO cluster:325 Checking for /home/nutanix/.node_unconfigure to disappear on ips [u'192.168.100.11', u'192.168.100.10', u'192.168.100.13', u'192.168.100.12']
2016-01-22 09:07:47 INFO cluster:325 Checking for /home/nutanix/.node_unconfigure to disappear on ips [u'192.168.100.11', u'192.168.100.10', u'192.168.100.13', u'192.168.100.12']
2016-01-22 09:07:50 INFO cluster:325 Checking for /home/nutanix/.node_unconfigure to disappear on ips [u'192.168.100.11', u'192.168.100.10', u'192.168.100.13', u'192.168.100.12']
2016-01-22 09:07:52 INFO cluster:325 Checking for /home/nutanix/.node_unconfigure to disappear on ips [u'192.168.100.11', u'192.168.100.10', u'192.168.100.13', u'192.168.100.12']
2016-01-22 09:07:55 INFO cluster:325 Checking for /home/nutanix/.node_unconfigure to disappear on ips [u'192.168.100.11', u'192.168.100.10', u'192.168.100.13', u'192.168.100.12']
2016-01-22 09:07:58 INFO cluster:325 Checking for /home/nutanix/.node_unconfigure to disappear on ips [u'192.168.100.11', u'192.168.100.10', u'192.168.100.13', u'192.168.100.12']
2016-01-22 09:08:01 INFO cluster:325 Checking for /home/nutanix/.node_unconfigure to disappear on ips [u'192.168.100.11', u'192.168.100.10', u'192.168.100.13', u'192.168.100.12']
2016-01-22 09:08:03 INFO cluster:325 Checking for /home/nutanix/.node_unconfigure to disappear on ips [u'192.168.100.11', u'192.168.100.10', u'192.168.100.13', u'192.168.100.12']
2016-01-22 09:08:06 INFO cluster:325 Checking for /home/nutanix/.node_unconfigure to disappear on ips [u'192.168.100.11', u'192.168.100.10', u'192.168.100.13', u'192.168.100.12']
2016-01-22 09:08:09 INFO cluster:325 Checking for /home/nutanix/.node_unconfigure to disappear on ips [u'192.168.100.11', u'192.168.100.10', u'192.168.100.13', u'192.168.100.12']
2016-01-22 09:08:12 INFO cluster:325 Checking for /home/nutanix/.node_unconfigure to disappear on ips [u'192.168.100.11', u'192.168.100.10', u'192.168.100.13', u'192.168.100.12']
2016-01-22 09:08:14 INFO cluster:325 Checking for /home/nutanix/.node_unconfigure to disappear on ips [u'192.168.100.11', u'192.168.100.10', u'192.168.100.13', u'192.168.100.12']
2016-01-22 09:08:17 INFO cluster:325 Checking for /home/nutanix/.node_unconfigure to disappear on ips [u'192.168.100.10']
2016-01-22 09:08:18 INFO cluster:1993 Success!

nutanix@NTNX-SERIALNUM-A-CVM:192.168.100.10:~$

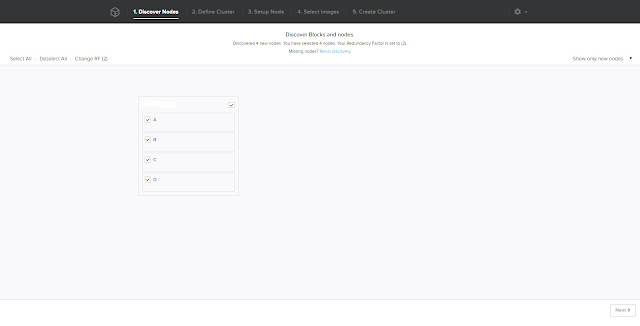
Once the cluster is destroyed, point your web browser to a CVM IP address on port 8000. For example: 192.168.100.10:8000/gui

This will take you to Foundation 3.0.1, which is now running inside the CVM rather than on a Linux workstation on your laptop.


See Converting ESXi to Acropolis Hypervisor - Part 2 - Foundation 3.0 for the next steps