The default password has changed since the early days of Nutanix. For a clean install of 4.5.x, login as admin admin. You'll be prompted to change the password immediately, as well as agree to the Nutanix EULA.
Now that you've logged in, you should see the Prism Home screen, which is a great overall dashboard.
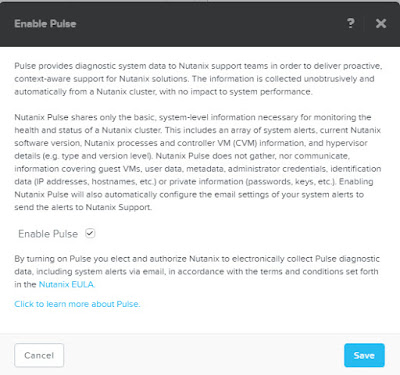
You'll see right out of the gate a red banner across the top, which is telling you to enable Pulse.
Click the "Learn more and configure Pulse" link.
Pulse is a great way to send diagnostic data to Nutanix in order to provide proactive support. There is no security sensitive information sent to Nutanix. I'm sure you've already read the EULA and want to enable Pulse. To do so, make sure Enable Pulse is checked and click Save.

Acropolis Hypervisor Image Service
Now let's pull some ISOs into the environment by using the Image Service. That way we have the software we need to build some VMs.
In the old days, you had to import ISOs or disk files into the Image Service with an acli command line string. However, this can now be done by using Prism.
Old Way
Login to any Nutanix CVM using SSH.
Enter the Acropolis CLI by typing acli and pressing enter.
The Image Service supports file access via http or NFS. If you're like me, you may have had your ISOs sitting on a Windows file server. It was a little annoying getting IIS configured to simply list the directory contents, but that's how I did it. I'm not an IIS expert by any stretch, so Google is your friend for that task.
Now that you're in the acli, let's pull in an ISO. I'm using CentOS 6.4 as an example.
<acropolis> image.create centos-6.4-x86_64-minimal source_url=http://iswblmvum01.tec.sirius/CentOS/CentOS-6.4-x86_64-minimal.iso container=default-container-12996 image_type=kIsoImage
The syntax can be viewed and explained by using the Acropolis Application Mobility Fabric Guide.
Essentially I created an image named centos-6.4-x86_64-minimal and pointed to my shiny fancy new IIS server, which was simply configured to use the existing file share as its root directory. You'll notice the container name specified for the container= argument is referencing a default container. This is the one that was created by the Foundation process when the cluster was built. You can tab complete this part via acli, and it will automatically put it there for you. When complete you should see a completion message.
ImageCreate: complete
You can now list the contents of your image store as well by issuing an image.list command in acli.
<acropolis> image.list
Image name Image UUID
WindowsServer2012-VL 1975dcf6-14c3-4bf9-9cc1-4ee88ae49b19
WindowsServer2012R2-VL 87a86643-1234-4648-b53e-359c8f13f87a
centos-6.4-x86_64-minimal 5136dedf-7d32-403c-8923-4fde986bc8ef
New (and improved) Way
Click the gear icon in Prism and select Image Configuration.
Click the "Upload Image" icon and give the image a name, a description (e.g. annotation), and select the image type. The image type will be ISO or disk. The Image Service supports raw, vhd, vmdk, vdi, iso, qcow2 disk formats. You can continue to upload from a URL if you prefer, or you can upload the file directly from your browser, which is very handy and a big time saver.
When you're finished, you'll see all of the images that have been uploaded. You can choose to activate them or make them inactive, which will hide them and prevent them from being used.
Acropolis Hypervisor Network Config
Now we need some networking for our VMs. Login into Prism and click the VM drop down from the menu. Look for a link in the top right corner that says Network Config. Click it.
Click the Create Network button.
Since old habits die hard, I'm calling my network 'VM Network'. I'm also not using any VLAN tags in this environment, so I've specified VLAN 0 to allow the native VLAN to come through.
Nutanix can do IP address management for you, so let's configure that as well to make things easy.
These steps are pretty straightforward. You define a network in CIDR notation (e.g. 192.168.50.0/24), along with the default gateway for that network.
You can choose whether or not you want to list DNS servers, as well as the domain search order, as well as the overall domain name.
If you have a TFTP boot server, you can define that here as well, along with the boot file name.
To set an IP range, click the "Create Pool" button under the IP Address Pools section. Provide a start and end address.
In my next post we'll finally get to the fun part...creating a VM.


No comments:
Post a Comment